Guides » Chat & Community
Chat & Community
Alliances
client guide1. Establish An Alliance
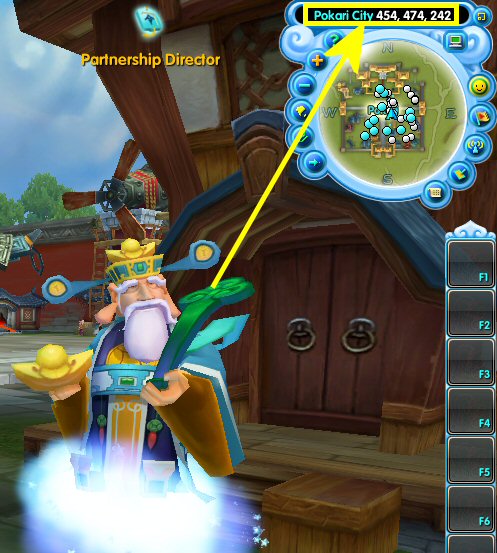
An Alliance must be established by an LV35+ Clan Chief. The fee is 30 Gold. Talk to the &pos:(455,242,473,1)Partnership Director(455.473)& in Pokari City to establish your Alliance. The initializing Clan will be the Lead Clan of an Alliance. A new Alliance will be a level 1 alliance, which will be available for supervising 2 Sub-Clans. The diagram below shows the position of the &pos:(455,242,473,1)Partnership Director(455.473)&.
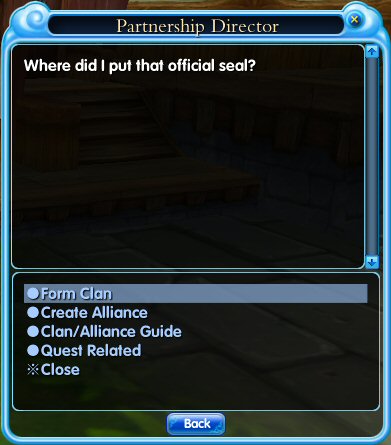
Select Create Alliance Clan from the Partnership Director's dialogue menu to establish an Alliance.
2. Alliance Quests
Each day an Alliance colleague can acquire the Alliance Quests from the &pos:(455,242,473,1)Partnership Director(455.473)&. The level of the Alliance determines how many types of quests the Alliance can accept daily. Alliance members gain Contribution from each Alliance Quest, raising the Alliance's Development level.
3. Alliance Membership
The member units of an Alliance are Clans instead of individual players. An Alliance can only invite Clans to be its Sub-Clan. The inviting process is similar to a Clan's:
1.The Alliance Marshal can select a member of a Clan, right click on her/his avatar, and select Invite to Alliance to send the invitation to the Clan's Chief. The Chief will see the invitation if she/he is online.
2.The Alliance Marshal can access the Alliance Menu, and click Invite. Input the name of the desired Clan, and confirm to send the invitation to its Chief. The Chief will see the invitation if she/he is online.
4. Alliance Management
Invite: Invite another Clan to join your Alliance.
Banish: Banish a Clan from your Alliance.
Leave: Leave the Alliance.
Transfer: Transfer the leadership of the Alliance to the Lieutenant.
Resign: Resign as the Marshal.
Change Slogan: Publish or change the Alliance Slogan.
Grant a Title: Offer an Alliance title to an Alliance colleague.
Promote: Assign a position to a Sub-Clan leader.
Demote: Dismiss a Sub-Clan leader.
Available Positions:
Lieutenant: Authorized to assign Elders, change slogan, grant titles, invite Clans, and banish Clans.
Elder: Authorized to invite Clans.
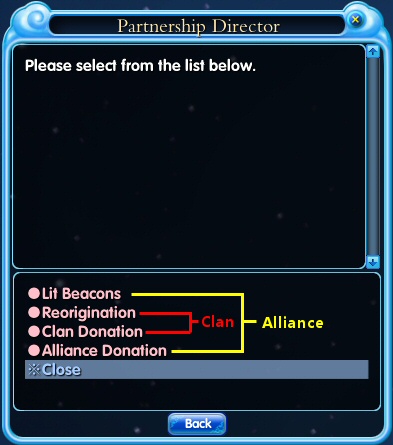
Dismiss the Alliance: Talk to the Partnership Director, and select Dismiss the Alliance to disband the Alliance.

Chat
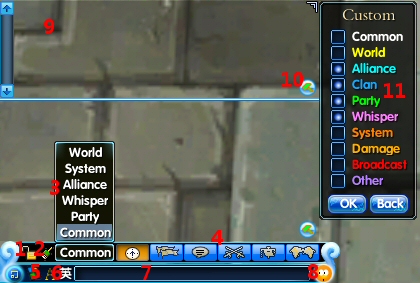
client guideChat Window:
1. Lock chat window
2. Clear chat window
3. Select the channel you want to view
4. Select the channel you want to speak in
5. Change background color of chat window
6. Change language input
7. Message field
8. Click to access emoticon menu
9. Customizeable chat window
10. Click to access the settings of the customizeable chat window
11. Options for the customizeable chat window.(Multiple choices available)
Clans
client guide1. Establish a Clan
1. Talk to the &pos:(455,242,473,1)Partnership Director(455.473)& in Pokari City, and select Establish a Clan.
Select Form Clan from the Partnership Director's dialogue menu to create a clan.
2. Input a name for your Clan.
3. Pay a fee of 5 Gold to establish your clan.
4. The user that establishes the Clan will be its Chief. A Clan can have 15 members at most.
2. How to Add Members to Your Clan
There are two ways to invite other players to your Clan:
1.Select a player and right-click on her/his avatar, then click on the Invite to Clan button in the menu. An invitation will be sent to the player. One must wait for the player to accept your invitation.
2.Press G to access the Clan Menu, click on the Invite button, and input the desired player's name, then click Confirm to send the invitation.
3. Clan Management


Press G to access the Clan Menu. Only the Clan Chief has the authority to access the functions below.
Invite: Invite a player to become a part of your Clan.
Banish: Banish a member from your Clan.
Change Slogan: Publish or change your Clan slogan.
Transfer: Transfer leadership to a Clan member.
Dismiss: Find the Partnership Director in Pokari City in order to dismiss your Clan.
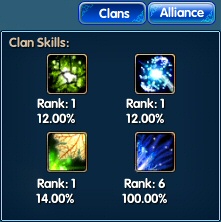
Clan Skills: Every Clan member is allowed to use Clan Skills. There are three active Clan Skills and one passive Clan Skill.

Clans
Friends
client guideMastering the Friend System will make you a specialist when interacting with other people in the game.
1. Add a Friend
Press F to access the Friend List, and click Add. Input a player's name to send an invitation. If the player accepts your invitation, the player's name will be added to your Common group. You can right-click on a friend name, and select Delete to delete that friend.
2. Group Your Friends
The Common group is a default group. You can add new groups by right-clicking on the blank in the Friend Menu and selecting Add Group. Input a name for this group and press Enter to confirm. You can add at most 10 friend groups. You can right-click on a friend's name and select Move to to move it to another group. Friends will be displayed in different colors on your map. You can right-click on a Group to define the on-map color of the friends in that group.
3. Send Message
Send Message: Double-click on a friend's name in your friend list to pull up the chat window and send a message. When you receive messages from other players, the chat window icon flashes, allowing you to press Ctrl + Alt + Z to quickly access the chat window. You can also send a message by pressing Enter while holding the Ctrl key.
Auto-reply: Right-click in the text-entry field in the Friend Menu, and select Auto-reply to compose an away message that will be automatically sent to other players.
Invite to Party: Right-click on a friend in Friend Menu and select Invite to Party to send an invitation.
4. Blacklist
The Blacklist function can block all messages and interactions from players on this list. You can add a player to your Blacklist by selecting their name and choosing To Blacklist. You can also click To Blacklist, and input the player's name in the dialogue box that appears. To delete a player from the Blacklist, select the player's name, then click on the Del button. You can have up to 50 players on your Blacklist.
Friends